A SparkleXrm solution consists of the following projects:
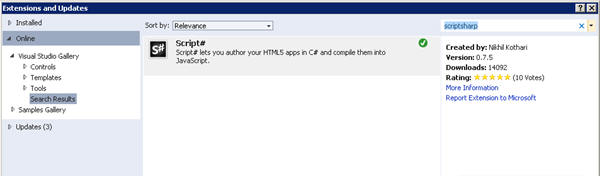
1. Install Script# using Visual Studio 2012’s Extensions & Updates dialog found in the Tools menu. Search for ‘ScriptSharp’ in the ‘Online’ section and click Install:
2. Create an empty solution in your CRM server and give the publisher a suitable prefix (I use dev1_ in this tutorial), and also install the SparkleXrm managed solution downloadable from GitHub
3. Install the Developer Toolkit for Visual Studio 2012 (http://msdn.microsoft.com/en-us/library/hh372957.aspx)
4. Copy the SparkleXrmTemplate folder to a new location and re-name the folder. The template solution can be downloaded from GitHub. The current build is a preview build - SparkleXrm_0_1_0_managed.zip
5. Open the solution and when prompted connect to your Crm server and select the solution you created in Step 2.

6. Select the ClientHooks.js and Client.js files respectively and in the properties rename the DisplayName and UniqueName so that it contains your own prefix.
7. If you want to output the minimised scripts, simply edit the CrmPackage.csproj and remove the <PreBuildEvent>
8. When adding html webresources, ensure that they have the correct UniqueName and DisplayName. This will ensure that the correct folder location is used for relative paths:
9. The last steps are about debugging. Under normal circumstances, to test your SparkleXrm application would have to make change, build, deploy, publish, repeat & rinse – this cycle can increase your development time during debugging because of the time take to deploy and publish. To get around this we use Fiddler’s AutoResponder feature.
10. Install Fiddler2
11. Run Fiddler and select the ‘AutoResponders’ tab. Check ‘Enable automatic responses’ and ‘Unmatched requests passthrough’
12. Use Tools->Performance->Disable Caching. This will prevent IE from caching those webresources even after you’ve updated them.
13. Fiddler acts as a web proxy – so any requests made from the browser go through Fiddler first. With the auto responder we can simulate webresources being published by responding to requests for your webresources with a version from your project rather than the published version in the CRM database.
14. To do this we click ‘Add’ and enter ‘regex:(?insx).+/Client.js’ in
the first textbox at the bottom, and then use the dropdown to browse for the
Client.js in your project.
Do the same for the ClientUI.js and later you
can do the same for any HTML files you add.
This is cool – this
technique is your friend! Remember to have the auto responder working, you
must have fiddler running.